Realtime global illumination (part 1)
I recently decided that I needed a simple and efficient global illumination solution for my game. The requirements were that it must be fast (I'm currently using an old Core 2 Duo laptop from 2010 with GeForce 320M), all lights must be dynamic, things like doors should interact correctly with illumination, and, dynamic objects should plausibly impact the indirect lighting.
I've been wanting to experiment with radiosity solutions for a very long time and I really like the idea of (pre-)computing form factors between patches and then simply iterating to propagate illumination between them. After hearing about dynamic global illumination in Unity, I decided I could do something similar in my engine with a good old radiosity solver (I think the first paper about it is from 1984 so it's definitely not a new thing).
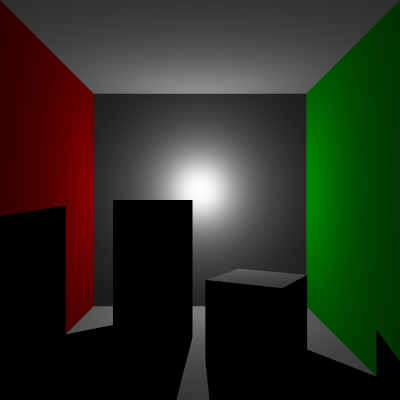
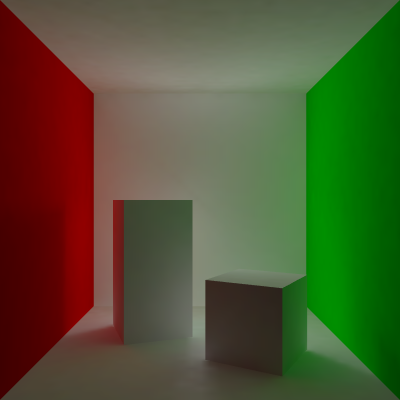
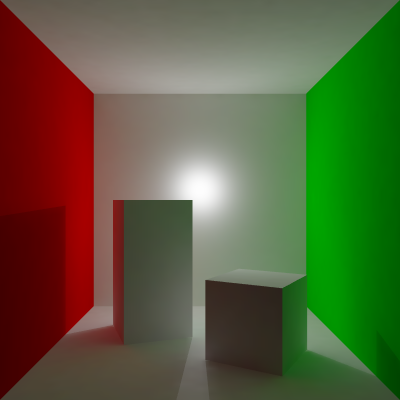
Direct illumination often contains high frequency content, while indirect illumination typically is much smoother. It's thus common practice to separate them, as in Figure 1. Direct illumination is rendered as usual (using shadow maps or shadow volumes) and indirect illumination is brought in through a texture, computed using a radiosity solution.
Light map
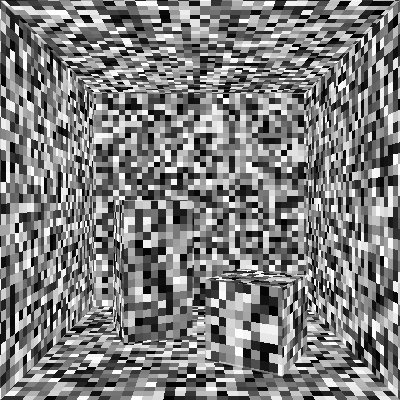
In order to solve for radiosity between patches, we must naturally first define some patches. Some algorithms tessellate the scene geometry into small geometrical patches, but that is way too expensive and quite unnecessary. Instead we use a light map, which maps a texture of patches (in the form of texels) onto the geometry, visualized in Figure 2.
This mapping can be done automatically (I do it in my asset pipeline for my game project), or manually. For this test scene I simply unwrapped everything manually in Blender.
Getting direct illumination into the map
The first challenge involves getting direct illumination into the light map. There are a number of options here. I tried the following:
- Ray tracing from the texels to the light source.
- Sampling a shadow map from the texels.
- Rasterizing the scene and injecting illumination into visible light map texels.
The first two approaches relied on sampling direct illumination from the light map texels. This added the complication of generating samples over the light map texels. Disregarding this, I had the following problems: Ray tracing was too slow and required many samples, especially for coarser light maps. Sampling a shadow map required many samples and a very high resolution shadow map. Lower resolution shadow maps caused popping artifacts and strobing in the overall light intensity with motion.

The solution I ended up with rasterizes a cube map around the point light (this would be a single frustum for a spot light), as shown in Figure 3. Instead of shading the scene normally I rasterize texel identifiers and compute the amount of illumination arriving at each texel. This is much faster than sampling from the texels and has the added benefit of always injecting the same amount of energy into the light map, even if texels are missed (a neighbor will get higher intensity). Because of this property, the cube map can be fairly low resolution (see Figure 4). All results in this post use a cube map with 128x128 pixel faces.


Left: From a 128x128 cube map. Right: From a 2048x2048 cube map. Below: The resulting indirect illumination from each configuration. It appears the cube map resolution matters very little to the resulting illumination.
The cube maps are so small that I ended up writing a fast software rasterizer for this particular case (reusing some binning and clipping code from my old research project). The tiled software rasterizer allows me to resolve each tile to the light map in turn, improving cache performance over rendering the entire buffer and then scanning it. I have not benchmarked it against a GPU based approach though (which is arguably the simpler choice). I am biased by the joy I get from SIMD optimizations :)
Because the cube map distorts the distribution of radiance from that of a sphere, the pixels must be weighted differently, based on the distance from the center of each face. I calculated the illumination contributed to a texel by a pixel to the following:

where l is the illumination of the light source, n is the number of pixels in the cube map (6*128*128), k is a normalization constant, and x/y are the normalized pixel coordinates. The formula should be correct because the direct illumination solution and the injected radiance matches, disregarding difference in resolution (you can flip between the two images - the number one tool for graphics programmers!). The normalization constant was numerically determined to be 1.909859. After computing these weights it's just a matter of summing up the contribution to each texel.
One last thing here: The contributed radiance injected into a texel should be normalized using the surface area covered by the texel (it actually stores irradiance). Intuitively, a large texel will receive a lot more samples than a small texel. I compute these per-texel weights in a preprocess by clipping overlapping triangles against each texel and sum the clipped areas of the triangles.
Computing form factors
This is done in a preprocess. A form factor is a scalar that determines the fraction of irradiance that is exchanged between two texels. For each texel, I determine a set of overlapping triangles (in texture space) and clip them against the texel. Samples are then distributed over the clipped polygons uniformly, tracing rays in cosine weighted random directions. Each hit ends up as a form factor between the source and destination texel with value 1 over the number of samples taken. Multiple hits to the same texel naturally combine into a single form factor with higher value. This will potentially give you one form factor per ray sent, which may be a lot. I'll talk more about form factor compression in a future post.
Propagating radiance
We now have direct illumination in the light map, in addition to form factors between mutually visible texels computed in a preprocess. The next step becomes propagating radiance in the scene. This part is actually extremely simple. For each texel, sum the weighted irradiance of each source texel with a non-zero form factor. Multiple bounces of radiance can be handled by inputting the previous solution and running again. I use the solution from the previous frame, which basically makes multiple bounces free but with some added latency.
Bonus material
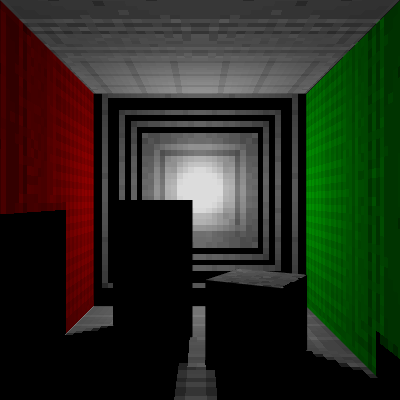
We can make some texels emissive by simply putting values in them:

This is what the test scene looks like while running (disregarding the horrible frame rate and colors because of gif):
Next time
In the next post(s?) I would like to address the following issues:
- Performance and scalability.
- Form factor compression and evaluation.
- Separation of a game level into multiple modules which can exchange radiance.
- Dynamic objects.
Go to part 2.